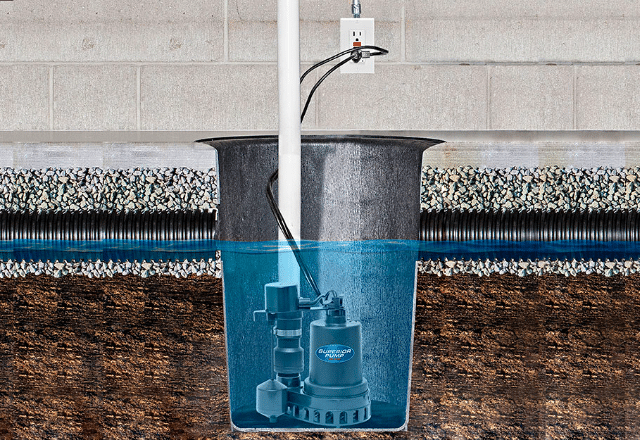
A sump pump is a pump used to remove water that has accumulated in a water-collecting sump basin located in the basement of homes. Backup sump pumps are utilized to prevent basement flooding, water damage, and mold growth by discharging water away from the home’s foundation. Installing a properly functioning sump pump system is crucial to keep basements dry all year round.
There are several key reasons to have a basement sump pump installation:
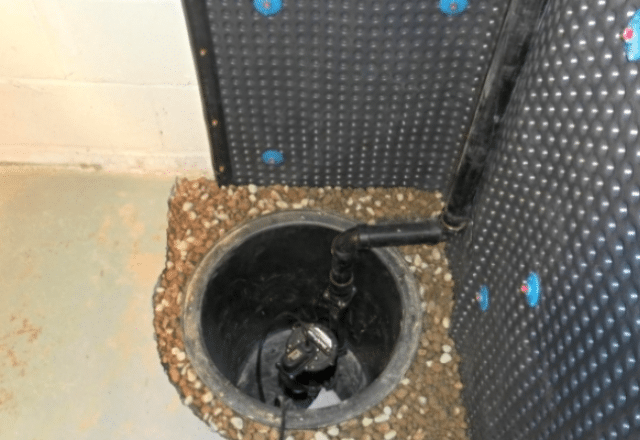
The location is a crucial consideration during basement sump pump installation:
– Existing Sump Pit: If there is already a sump pit or basin built into the basement floor, install the backup sump pump there as it likely already has a drainage system in place.
– Lowest Point: Identify the lowest spot in the basement where water accumulates during heavy rains or water table rise. This area likely has access to the perimeter drain tile that should feed into the sump basin.
– Near Plumbing: Costs are lower if the discharge line can outlet water fairly close to an external wall or existing floor drain connection.
– Accessible: The sump pump should be accessible for maintenance and inspection without requiring major dismantling of the system.
There are several varieties of sump pumps available:
– Pedestal Pumps: The most affordable option, but also the least reliable with a shorter lifespan.
– Submersible Pumps: Extremely reliable, long-lasting, quiet, and energy efficient but typically cost more upfront. The go-to choice for most homeowners.
– Battery Backup Pumps: Secondary sump pumps that kick in when the main pump fails or cannot match incoming water. Help guard against basement flooding during power outages. More expensive but provide crucial redundancy.
– Water-Powered Backup Pumps: Function off flowing basement water rather than batteries so they have very long lifespans. However, only operate when water levels get 15 inches or higher.
– Flat surface sump pump: A flat surface sump pump is a low-profile pump that sits directly on the basement floor or in a shallow depression. It’s ideal for finished basements with minimal water issues but less effective than traditional pit-installed pumps.
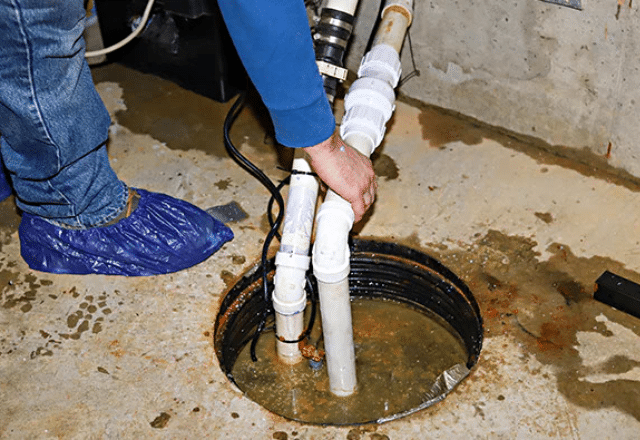
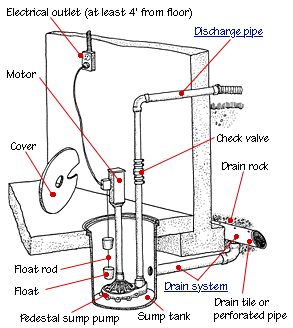
A complete basement sump pump system consists of the following elements:
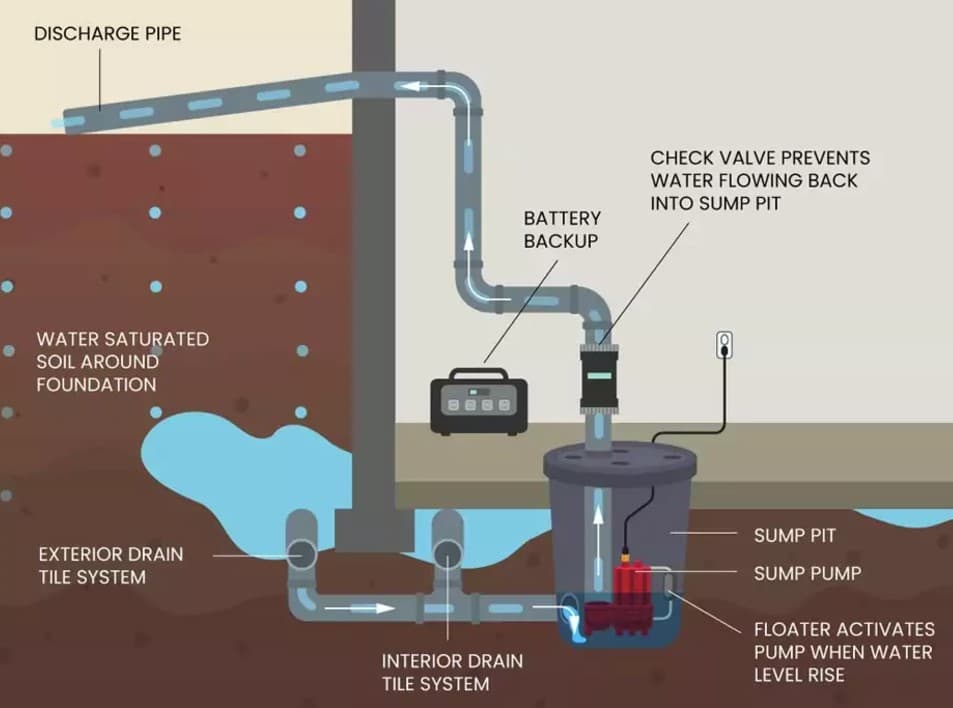
Once an installation location is chosen, prep the area by:
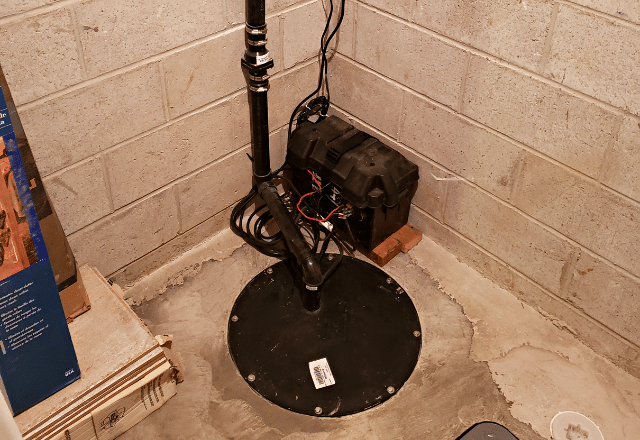
Follow these key steps to install a submersible basement sump pump system:
Start by selecting clean, washed gravel between 3/4 to 1-1/2 inches in diameter – this size allows optimal water flow while preventing sediment infiltration. Pour a 4-inch layer of gravel across the entire pit bottom, then use a hand tamper to compact it firmly, ensuring no soft spots remain. The gravel bed should be perfectly level to support the pump – check with a torpedo level in multiple directions. If using a basin liner, center it carefully in the pit and backfill around it with gravel to prevent shifting. The liner’s perforations must align with the gravel bed to allow proper drainage. Add an extra inch of gravel inside the liner to create a stable pump platform that won’t settle over time. Test the stability by pressing firmly on different areas – there should be no movement or sinking.
Gently lower the submersible pump into the center of the sump basin, keeping it perfectly vertical while descending. The pump must sit completely level on the gravel bed to prevent wobbling during operation. Check that the float switch has full range of motion and won’t get caught on the basin walls. Position the pump so its discharge outlet aligns with your pre-installed drain pipe. Ensure all power cables and any control wires remain untangled and route them neatly to your power source, keeping them away from the pump mechanism and float switch. The pump’s intake screen should have at least 2-3 inches of clearance from the basin bottom and sides to prevent clogging. Double-check that the pump is stable by gently pushing it from different angles – it shouldn’t tilt or shift position.
For the discharge pipe exit point, first locate wall studs and any existing utilities (water lines, electrical, gas) using a stud finder and utility detector. The ideal exit point should be 1-2 feet above ground level outside, sloping gradually down toward the sump basin at 1/4 inch per foot for proper drainage. Mark the hole center and drill a pilot hole from inside to confirm location. Then use a hole saw or concrete core bit matching your pipe diameter (typically 1.5-2 inches for residential pumps). For concrete walls, rent a rotary hammer drill with the correct size masonry bit. Keep the drill level and apply steady pressure. Install a rubber or plastic sleeve/grommet in the hole to protect the pipe and create a watertight seal. The sleeve should extend slightly beyond both wall surfaces. For finished basements, protect surrounding drywall and plan to patch/repair as needed around the new opening.
Measure and cut PVC discharge line to needed length. Attach a check valve at the terminal outlet end. Use PVC primer & cement to permanently bond all discharge line joints from pump to outlet. Ensure downward pitch for gravity drainage.
Securely attach the discharge pipe to the pump’s outlet using approved PVC cement or threaded fittings. Install the check valve just above the pump, then double-lock critical connections with stainless steel hose clamps. Test all joints by gently pulling to ensure they’re completely secure and won’t separate under pressure.
Firmly anchor the pump in the basin’s center using manufacturer’s mounting kit or heavy-duty braces. Verify it’s perfectly level and won’t shift during operation. Double-check vertical alignment and ensure float switch has full range of motion.
The battery backup pump installation begins with positioning it slightly higher than the main pump using a solid mounting platform that won’t interfere with the primary pump’s operation. The backup pump requires a separate float switch set about 2 inches higher than the main pump’s switch to activate only when needed. Install a dedicated check valve and discharge line that either connects to the main discharge pipe via a Y-fitting or runs independently. Mount a deep-cycle marine battery nearby on a raised platform to prevent water contact, and install the charging system/control panel within easy view. Secure all connections and test the entire backup system by lifting the float switch to ensure proper activation and water flow.
Install a dedicated 20-amp GFCI circuit breaker and outlet mounted at least 4 feet above the basin. A licensed electrician must handle all wiring, including conduit installation to protect cables. The outlet needs a weather-proof cover and should be easily accessible for maintenance. Double-check the pump’s power requirements match the circuit rating.
Power on pump to verify smooth operation without leaks, kinks, clogs or backflows through any discharge piping. Perform brief test cycles to check pump shutoff level.
A pedestal sump pump install follows a similar anchoring, discharge, and power connecting process, but start by securely fastening the pump base to the basin floor before making water line connections.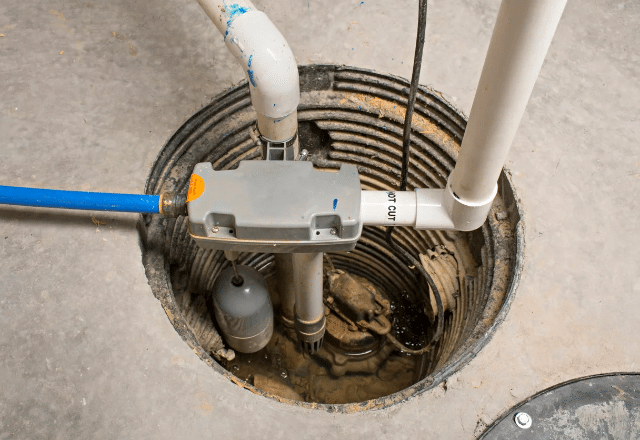
After installing a basement sump pump:
– Pour five gallons into basin and flip float trigger to verify automatic turn on/off cycle at appropriate heights.
– Pour additional water to make pump run continuously for 5-10 minutes. Inspect all discharge lines and connections for leaks.
– Use pump periodically by pouring spare gallons into basin even if no basement moisture issues exist just yet. Prolonged sitting water can increase sediment buildup and impeller corrosion.
Regular maintenance steps include:
– Monthly inspections of float trigger sensitivity and debris clearance in basin.
– Annual checkups to examine pump, lines, and pit for sediment buildup or cracks plus battery replacement in backup unit. Leverage plumbers for more complex testing and repairs.
– Every 2-3 years have backup pumps fully activated during simulated power failures.
Installing a properly functioning sump pump system takes research, precision, and some construction finesse but pays major dividends by keeping basements dry and protecting properties from catastrophic flood damage. Ensure full drainage functionality before finishing basement spaces. Consider adding interior perimeter drains or French drains if very damp basement conditions persist after sump pump installation. Be proactive against basement flooding because just an inch of water can mean thousands in repairs and months of headaches. Stay dry!
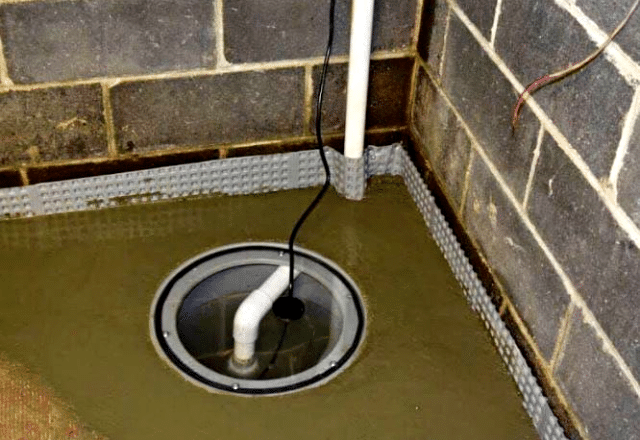
The cost of installing a sump pump can vary depending on several factors, such as the type of sump pump you choose, the size of your basement, and whether you need to install a new sump pit or just replace an existing pump. Here’s a general breakdown of the costs involved:
On average, you can expect to pay anywhere from $500 to $2,000 or more for a complete sump pump installation, including the pump, pit, piping, electrical work, and labor. However, the actual cost can vary significantly based on the specific requirements of your home and the contractors you hire.
Q: How can I take extra care to maintain my system before wet months hit?
A: Prior to annual flood seasons, thoroughly clean basins of all debris and silt buildup that could clog pump intakes. Examine float triggers, discharge pipes, and check valve functionality.swap in new backup batteries. Briefly test that primary and secondary units activate properly at high water levels.
Q: How to install a sump pit in existing basement?
A:
Installing a sump pit in an existing basement starts with selecting the lowest point where water collects. The concrete floor must be cut to create a hole larger than the sump basin, followed by excavation and addition of a gravel base. The basin is installed with proper drainage pipes, and a sump pump is connected with appropriate electrical wiring. For finished basements, careful removal and restoration of flooring materials is necessary, and an access panel should be created for future maintenance.
The entire process requires careful waterproofing, proper sealing of wall penetrations, and attention to local building codes. While this can be a DIY project, professional installation is recommended, especially in finished basements, as mistakes can lead to flooding or foundation damage. The system typically lasts 10-15 years with proper maintenance and provides reliable basement water control when correctly installed.
Q: How do I know if replacement pumps or basin upgrades are needed?
A: If over 10 years old, it’s wise to replace pedestal pumps with modern submersible units for longevity and efficiency. Pit liner cracks or extreme corrosion also signal upgrades. Annoyingly frequent activiations imply drainage volumes exceed pump capacity or signify blockages.
Q: What pump types are ideal for houses with crawl spaces or concrete slab floors?
A: For crawl spaces, smaller effluent pumps that only discharge greywater from air conditioning units or dehumidifier flows may do the trick. In spaces with concrete floors, external perimeter drainage tiles can feed inward to sump pits even if no basement exists.
Q: How much might a fully reliable sump pump system cost on average?
A: With professional installation, homeowners pay $1,100-1,900 for complete systems with a basin, submersible pump, battery backup, check valve and discharge line. DIY costs for just replacement primary pumps run $200-500 sans labor fees.
I bring over 9 years of dedicated plumbing experience to the table. As a seasoned professional in the plumbing industry, I've tackled a wide range of projects, from residential repairs to large-scale commercial installations.

