5 Star Plumbing | Garbage Disposal Replacement
4616 Roseville Rd #109, North Highlands, CA 95660
E-mail us: us@5-starplumbing.com
Follow us:
Page Title BG

Garbage Disposal Replacement

5 Star Plumbing > Blog > Garbage Disposal Replacement
Table of Contents

Depending on the individual doing the installation and the type of device, replacing the garbage disposal might take anywhere from 30 minutes to several hours. It may take 10 to 20 minutes to be ready, including cutting off the water and power and removing the old unit.

It can take anywhere from 20 to 60 minutes to install a new unit, and another 10-15 minutes to test the disposal’s performance. About 10-15 minutes could be needed to finish cleaning the area. The job may often be finished in under an hour by a professional plumber or handyman.

Verify if the garbage disposal is actually broken

A garbage disposal frequently isn’t technically malfunctioning when it stops functioning. Depending on how the device is acting up, there are two troubleshooting options to consider.

    • Check the outlet if you flip the switch to power and nothing happens. This outlet is typically found underneath the sink, where it’s simple for the plug to become accidentally dislodged while accessing supplies kept in this area.
      The device’s internal circuit may have tripped if firmly plugged in. Find and press the tiny red button on the unit’s base to reset the circuit. The disposal has to be replaced if it remains silent and still after being turned on.
    • The likelihood of the disposal’s blades being jammed is increased if, when you flip the switch, the motor hums but the blades don’t turn. Check inside the device with a torch.
      Cut the power to the device and remove the obstruction using a long fork or a pair of pliers if you notice a wayward utensil, peach pit, or other blockages, or if there is a lot of fibrous trash, like celery, wrapped around the blades.
      Garbage disposals have razor-sharp blades, so never put your fingers inside! The garbage disposal needs to be replaced if it continues to hum after being cleaned; turn it on and give it a try.

How much labor time to replace garbage disposal?

An expert installer can install a new disposal in two to four hours on average. In order to make the entire system functional again, this involves measuring the location of the disposal, removing all the pipes, installing the disposal, and fitting new pipes.
To ensure that all of the pipes fit without using up all of your storage space, this method needs to be precise. You’ll need an electrician to establish a power connection for the garbage disposal if one isn’t already there.
This includes attaching it to a switch, thus the only alternative that will likely function without requiring additional assistance from an electrician is to use an existing connection that wasn’t built for it.
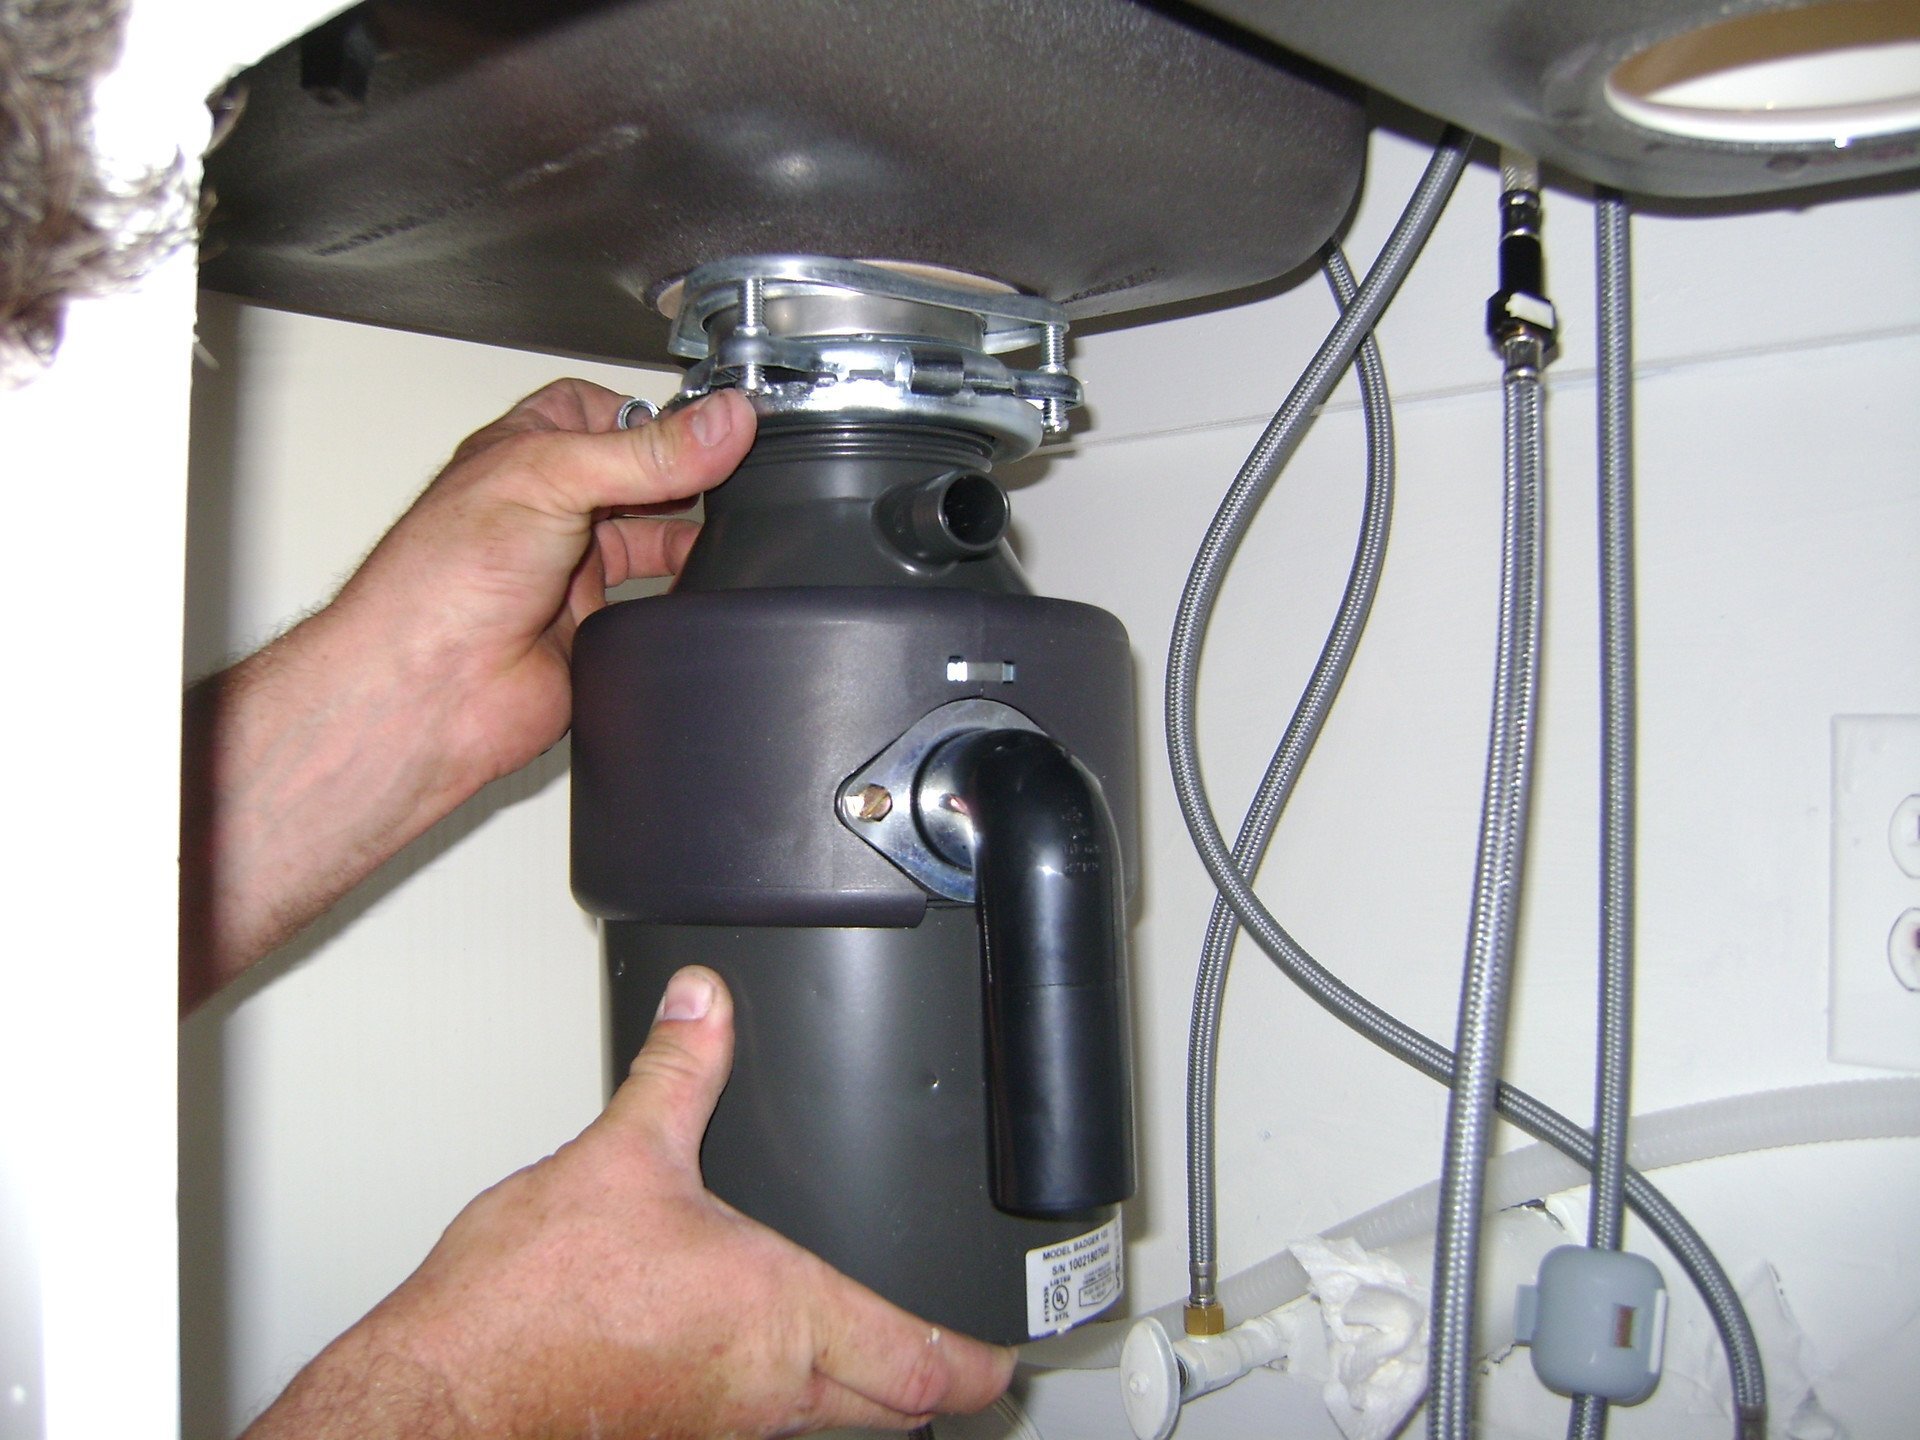
Attempt to replace it yourself to save money

5 Star Plumbing | Garbage Disposal Replacement

A brand-new garbage disposal may be purchased for as little as $50, but at that price, you’ll likely only get a small, underpowered machine that will struggle to grind up anything except the softest of scraps.
At the upper end, for around $200, you can purchase a powerful, comparatively silent appliance made of stainless steel with a few years of warranty and, frequently, an auto-reverse start, which causes the blades to spin in one way before turning backward to prevent most jamming issues.
Most people can meet standard kitchen needs with a garbage disposal in the $75–100 price range since it has enough strength and durability.
Inability to use a plumber for installation results in significant savings. The task usually requires a few hours, and it costs $100 on average each hour. Remember, too, that the majority of the installation process will involve stooping to access the cramped space beneath your kitchen sink, so if your back isn’t capable of a protracted and painful stoop, you might be better off hiring someone.

Basic tools are needed for the job

You will need a new unit and some simple tools to replace a broken device. The following are the most frequently needed tools, however, exact requirements may vary based on the model:

      • Screwdriver with a flathead
      • the Philips screwdriver
      • Sharp-nosed pliers
      • Hammer
      • Plaster of Paris
      • Sticky knife
      • Flashlight

Turn off the electricity before you begin

Nothing should be done until the power has been turned off, just as with any repair or replacement of an electrical appliance. Start by unplugging the waste disposal. Next, turn off the power to the garbage disposal before going to your home’s main circuit breaker box.
If you are unsure of which circuit breaker powers your garbage disposal, turn it on (or the dishwasher if the disposal is entirely nonfunctional) and flick each circuit switch individually until you reach the one that turns the disposal off.

Replace a Trash Disposal: How to Do It

You don’t need to worry if your garbage disposal breaks down because installing a new one is a simple task that you can complete on your own in a matter of minutes. We’ll demonstrate how:

Removing the old disposal unit

      • Turn off the power to the garbage disposal
        Locate the switch for the garbage disposal unit at your home’s main circuit breaker. Make sure the switch is in the “Off” position. Now you won’t have to be concerned about unintentionally obtaining a painful shock while working.
        Due to the fact that garbage disposals are electrical devices, a live current is always flowing through them when the power is on. Ensure that your waste disposal has also had its water turned off.
      • Identify your garbage disposal
        Open the cabinet doors under your sink, and look directly behind the drain. Between the plumbing pipes and the drain’s bottom, there ought to be a sizable cylindrical object visible. You will actually be replacing this garbage disposal device.
        Make a note of the disposal’s brand and model. It will only require the removal of the old unit and the screwing on of the new one to replace it with a similar model.
      • Disconnect the discharge tube
        Find the pipe leading from the disposal’s side to the underground plumbing. At the point where the pipe connects to the object, loosen any nuts or bolts and pull the pipe away with a strong tug.
        Food scraps that have been ground up must exit the disposal via the discharge tube. A second tube may be used to connect some older waste disposals to the dishwasher’s water supply. In a similar way, this one can be detached.
      • Release the old disposal from the mounting ring
        You should notice a thin metal ring with three distinct lugs, or protruding arms, at the top of the device.
        To remove the old component, grasp these lugs with one hand and rotate the entire ring counterclockwise roughly 1.5 inches (3.8 cm). To prevent a mess, place it aside on a piece of newspaper or an unfolded rag.
        Be prepared to grasp and hold the unit once it separates from the mounting ring as garbage disposals frequently surprise people with how heavy they are.
        Put a few paint cans, some scrap wood, or a stack of phone books behind the disposal to serve as a support platform.
      • Separate the disposal from the power supply.
        Flip the device over and check the bottom for the round or square faceplate. This serves as the electrical house cover. Remove the green screw from the faceplate and place the copper ground wire over it. To detach the colored wires from the primary power source, pinch the plastic wire connections.
        The release of wire connectors that are too small to unclip by hand could benefit from the use of a set of needle nose pliers.

Changing Damaged Mounting Hardware

        • Pull off the existing mounting ring
          The mounting ring is held in place by a rubber snap ring that must be removed from the bottom. It should then be easy to remove the mounting ring itself.
          Make sure to take out any rubber gaskets if there are any sandwiched above the mounting ring. If it appears to be in good condition, think about preserving your current mounting hardware. It will be significantly quicker and simpler to install the new disposal as a result.
        • Loosen the nut securing the rest of the assembly
          A circular plastic object like the mounting ring can be seen right below the sink flange where the drain flows into the garbage disposal. This component’s lugs can be turned counterclockwise by inserting the tip of a screwdriver into one of them. Set the nut aside after removing it.
          If a mounting nut has been in place for a long time, you might need to use quite a bit of force to remove it. If you’re having difficulties getting it to move, try pushing the screwdriver handle with both hands as opposed to pulling it. This will allow you to get more leverage.
        • Remove the sink flange
          The metal ring that wraps around the drain aperture is called a flange. Before standing up and lifting the flange out from the top, wiggle or push on the flange’s bottom from below. You can also add the old sink flange to your collection of components that will be discarded.
          Use a putty knife to scrape out any dried-out, crusted plumber’s putty that is visible where the flange formerly was.

          Before attempting to attach the new flange with adhesive, thoroughly dry the drain opening with a clean cloth.

        • Install the new sink flange
          Fresh plumber’s putty should be applied in a ring around the borders of the flange’s bottom. Put the narrow end into the drain aperture and firmly press the flange into place. As the putty starts to form up, hold it for 30 to 60 seconds.
          When the adhesive has had time to completely dry, apply consistent pressure to the new flange using a heavy object like a toolbox or the old garbage disposal machine. Depending on the particular product you’re using, this could take anywhere between 10 and 20 minutes.
          Also, the extra weight will stop the flange from moving when you attach the new component.
          In addition, you have the choice of substituting silicone sealer for conventional plumber’s putty. Many professionals in the home renovation industry assert that silicone has a better grip and offers a waterproof seal that lasts longer.
        • Connect the new mounting assembly
          Then, slip a second metal flange over the bottom of the new sink flange while working in reverse order. Place screws into each of the open screw holes after positioning the new mounting ring.
          Holding the component in position while tightening the screws against the lower flange requires two hands. To check for security, gently shake the newly installed mounting assembly from the bottom.

Setting Up the New Disposal

          • Secure the replacement disposal to the mounting ring
            Align the upper edge of the new unit with the mounting ring’s lower lip as you lift it into place. Twist the garbage disposal to start threading it into the grooves.
            Then, insert your screwdriver into one of the metal lugs and turn the mounting ring clockwise until you feel the garbage disposal lock in place. The weight that has been holding the new sink drain in place can now be taken off.
          • Reattach the electrical wires
            Remove the replacement unit’s faceplate by unscrewing it from the bottom. Using plastic wire nuts, connect the colored wires on the power supply to the electric casing of the disposal by matching their colors. At the compartment’s outermost edge, place the copper grounding wire over the green screw. Screws should be tightened and the cover replaced.
            The majority of garbage disposals feature just two sets of connections: a pair of red wires and a pair of white or black wires. It is also a good idea to color-code any new wires for ease of use. Putting them back together will be simple as a result.
            The disposal’s main power must be turned off the entire time for your personal protection.
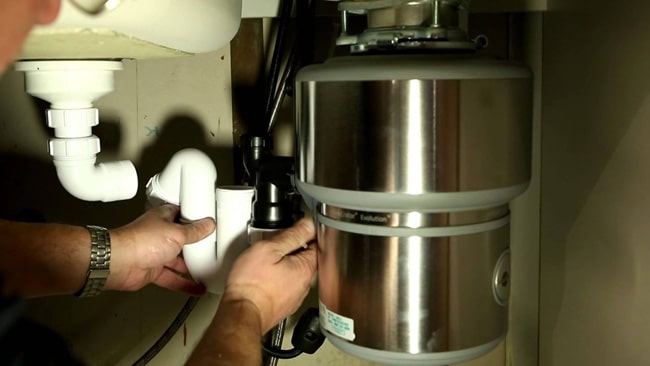
          • Reconnect the discharge tube
            The tube should be pushed until it is flush with the aperture by aligning the end of the tube with the valve on the side of the new disposal unit. Any nuts or other fasteners should be tightened. To secure the discharge tube to the disposal valve with flexible dishwater hose connections, think about using a separate metal clamp.
          • Trim the discharge tube as needed
            There’s a significant likelihood that the discharge tube won’t be the proper length to connect to the ground plumbing valve if you’ve upgraded to a larger disposal or one of a different kind. However, there is an easy repair for this; simply mark the area on the tube where it should align with the drain pipe and use a hacksaw to trim it to size.

            That ought should fit perfectly. You’ll need to visit your neighborhood home improvement store to get a replacement discharge tube if the existing one is too short to fit the new unit.
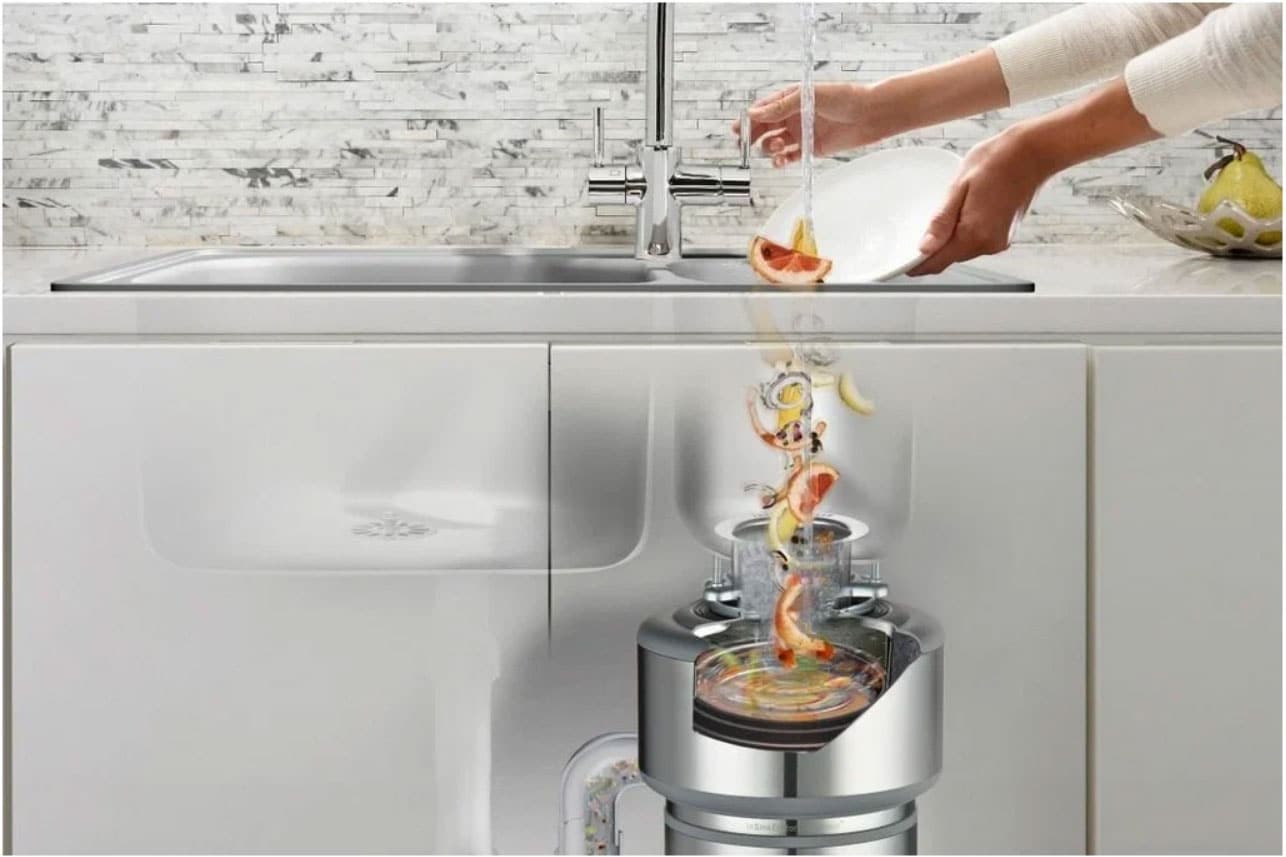
          • Run water through the disposal to check for leaks
            Open the faucet and let it run for 15 to 20 seconds. Be sure there is no water leaking out of any of the connection points surrounding the new unit while it is operating. You shouldn’t experience any issues as long as each component is well-fitted.
            Use a line of Teflon pipe joint compound or a strip of thread seal tape to seal any little leaks you discover.
            Don’t forget to dry the plumbing fixtures before addressing a leak so that the glue will adhere.
          • Test the new disposal
            Return and turn the garbage disposal breaker to the “On” position. Go back to the kitchen and turn on the disposal with the power switch there. Pay attention to the sound. No humming, grinding, or excessive vibration should be present. Declare yourself successful for a job well done.
            Double check the sink to make sure there aren’t any tools, screws, or other stray items there. They shouldn’t be able to tumble into the garbage disposal.
            Get a qualified plumber to take a closer look at the new disposal if it is making strange noises or doesn’t seem to be working properly. There can be a problem with the device’s internal mechanisms.

Professional Installation vs. Do-It-Yourself

5 Star Plumbing | Garbage Disposal Replacement

Yet, it is possible to install a garbage disposal oneself. Qualified 5-starplumbing plumbers can complete the installation quite quickly. The secret is understanding what to do and figuring out how to prevent issues like leaks, water hammering, and drainage problems. If you decide to do it yourself, make sure you thoroughly research the subject and allow enough time for completion.

Conclusion

Garbage disposal installation doesn’t have to be difficult or time-consuming, but you should leave it to a qualified plumber to prevent any issues. Ask 5-Star Plumbing for assistance installing your garbage disposal.

FAQ

What is the turnaround time for a garbage disposal replacement?

The complexity of the task, the amount of knowledge of the installer, and the particular model of the trash disposal are some of the variables that can affect how long it takes to replace a garbage disposal. This process will not be less than an hour, possibly more than 2 to 3 hours.


How much equipment and supplies will I need to fix a garbage disposal?

The complexity of the task, the amount of knowledge of the installer, and the particular model of the trash disposal are some of the variables that can affect how long it takes to replace a garbage disposal. This process will not be less than an hour, possibly more than 2 to 3 hours.


Is hiring a professional necessary or can I fix a garbage disposal myself?

You normally need a screwdriver, pliers, hex wrench, new parts, oil, and safety gear to fix a garbage disposal. Depending on the amount of the repairs required, the price of these items can be anywhere from $20 and $200.


What are some typical issues that could occur while replacing a garbage disposal, and how can they be prevented?

Leaks, faulty wiring, and difficulties removing the old machine are common problems when replacing a garbage disposal. They can be prevented by closely adhering to installation guidelines, ensuring adequate wiring, and employing the appropriate tools.

 
Share:
Mike Joshua

Mike Joshua, a 33-year-old plumber based in California. With a passion for solving complex problems and a commitment to his trade, Mike has dedicated the past 8 years of his life to honing his skills as a professional plumber. After completing technical college Mike quickly secured a job in a plumbing company and has been working steadily ever since. Mike's experience includes not only households but industrial gas and plumbing systems and installation, repair the equipment for different types of business He is known for his attention to detail, strong work ethic, and ability to complete projects on time and within budget. He is always striving to improve his skills and stay up-to-date with the latest industry developments and advancements. In conclusion, Mike enjoys outdoor activities such as hiking and camping. He also has a passion for DIY projects around the home and is always looking for new challenges to tackle.

Leave a Comment