Water on the floor behind a toilet is easy to blame on the toilet itself. More often it comes from the supply line: the short hose that runs from the shutoff valve on the wall to the bottom of the tank. It has only a few places where it can leak, so finding the source takes a dry paper towel and two minutes.
Step 1: Dry Everything and Watch
Wipe the floor, the valve, the line, and the bottom of the tank completely dry. Then wrap a dry paper towel around each connection, one at a time, and wait a minute. The towel that gets wet points to the leak. Flush once while you watch, because some leaks only show when the tank refills.
Step 2: Check the Four Leak Points
- The valve stem. Water beads around the handle of the shutoff valve. The packing inside the valve has worn.
- The nut at the valve. Water collects where the supply line threads onto the valve outlet.
- The nut at the tank. Water drips from the plastic coupling nut under the tank.
- The line itself. A bulge, a kink, a frayed braid, or a wet spot in the middle of the hose.
If all four are dry and the floor still gets wet, the leak is probably the wax ring under the toilet or a crack in the tank. That is a different repair, covered on our toilet installation and repair page.
Step 3: Tighten the Connection
For a drip at either nut, start by tightening. Turn the plastic nut at the tank by hand only, a quarter turn past snug. Plastic threads crack easily, and a cracked nut leaks worse than a loose one. The metal nut at the valve can take a quarter turn with an adjustable wrench while you hold the valve body steady with a second wrench, so the pipe in the wall does not twist.
Dry the area, flush, and check again with a paper towel.
Step 4: Replace the Supply Line
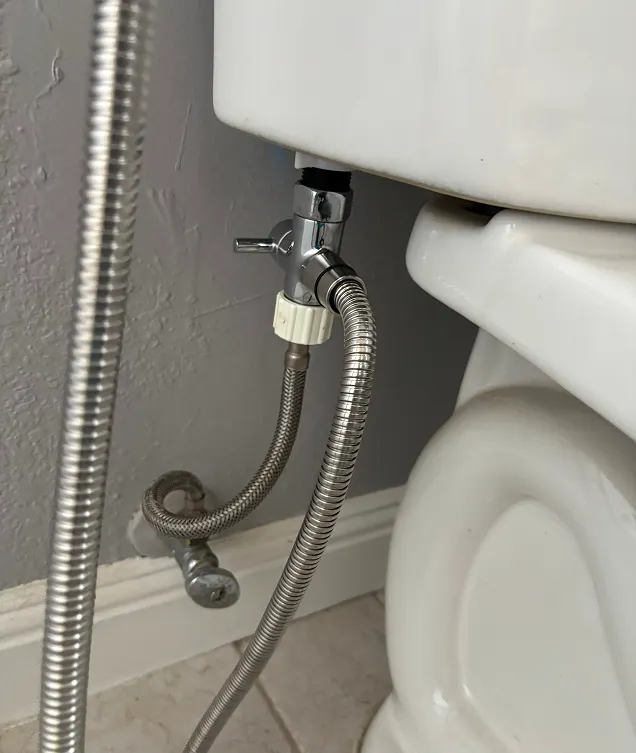
If tightening does not stop the drip, or the hose shows any damage, replace it. A new braided stainless line is an inexpensive part and the job takes about fifteen minutes.
- Turn the shutoff valve clockwise until it stops.
- Flush and hold the handle down to empty the tank. Sponge out what is left.
- Unscrew both nuts and remove the old line. Keep a towel underneath.
- Match the new line to the old one: same length, same connection size at the valve (usually 3/8-inch compression), and a 7/8-inch fitting for the tank.
- Thread both nuts on by hand. Snug the tank side by hand and the valve side a quarter turn with a wrench.
- Open the valve slowly and check both ends with a dry paper towel.
Many homes still have plain plastic or old rubber supply lines. A burst line can release water as fast as the pipe can deliver it, so swapping those for braided stainless is worth doing even before they leak.
When the Shutoff Valve Is the Problem
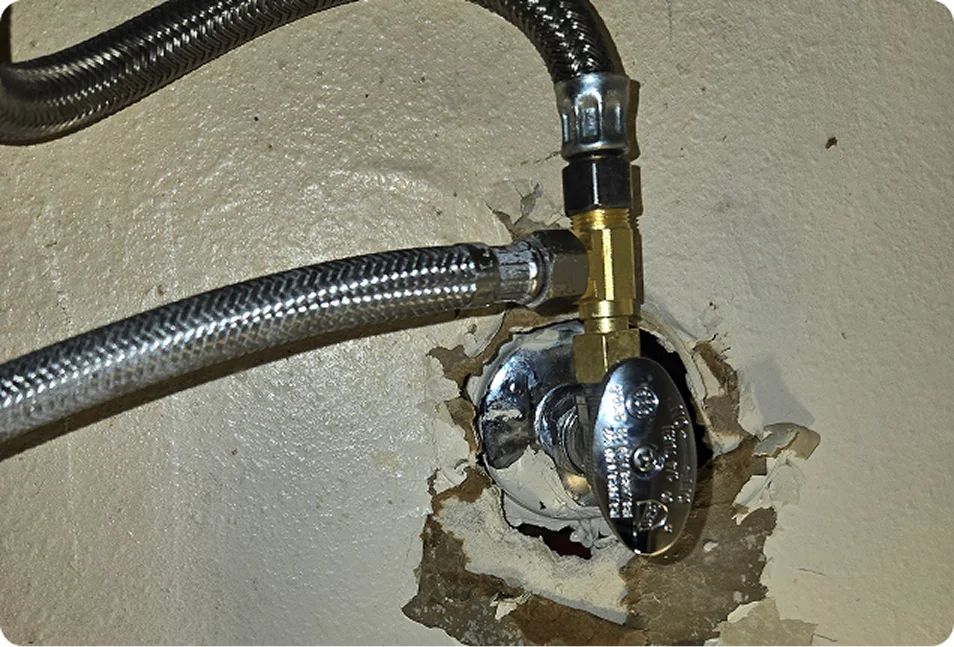
If the valve leaks at the stem, will not turn, or will not fully stop the water, the valve needs replacing. Older multi-turn valves seize after years without use, and forcing them can break the stem or crack the pipe behind the wall. Replacing an angle stop means shutting off the water to the whole house, so it is a good point to call a plumber. We replace angle stops and supply lines together as part of our valve and appliance connection service.
Toilet Supply Line Questions, Straight Answers
Can I use plumber’s tape on the supply line threads?
No, it is not needed. Compression fittings and the tank coupling seal with their own washer or cone, not with the threads. Tape on those threads can actually keep the seal from seating.
How often should a toilet supply line be replaced?
Many manufacturers suggest checking braided lines yearly and replacing them about every five years. Replace any line right away if it is kinked, bulging, rusted at the nut, or wet.
Why does the leak only show up after flushing?
That is normal for a slow leak at a connection. The line is under full pressure while the tank refills, and a worn washer seeps most during that time.
Is a small drip behind the toilet urgent?
Yes, it is worth fixing the same day. A slow drip soaks the subfloor and the base of the wall long before it looks serious, and a weak supply line can fail all at once.
Related Guides
Want It Done Right the First Time?
Send us a photo of the valve and the line, and we will tell you whether it is a quick fix or a valve replacement. See our toilet installation and repair service.